
META AI SMART
GLASSES N8N WORKFLOW
BLUEPRINT
GLASSES N8N WORKFLOW
BLUEPRINT
( Developed and curated by Shane Perry )
Download The N8N Blueprint to Automate Your Workflows Using Meta AI Smart Glasses and Reclaim up to 5+ Hours a Day! 🚀
Download Workflow Blueprint & Import Into N8N.io
Step 1: Download the N8N Workflow Blueprint
- Access the Download Link
- Go to the page with the N8N workflow blueprint (in your case, the “Meta AI Smart Glasses N8N Workflow Blueprint” page).
- Locate the download link for the N8N workflow blueprint.
- Download the File
- Click the download button to save the .json or any other compatible file to your local machine.
Step 2: Log into Your N8N Account
- Go to the N8N Website
- Open your browser and visit N8N.io.
- Log In to Your Account
- Use your credentials to sign in. If you don’t have an account, you may need to create one.
Step 3: Import the Workflow into N8N
- Go to the Workflows Section
- After logging in, navigate to the Workflows section from the dashboard.
- Import the Workflow
- Click the Import button, usually located on the top right.
- Select the downloaded .json workflow file from Step 1.
- Confirm and Launch
- Review the imported workflow if necessary. Once you’re ready, click the Execute or Launch button to activate the workflow.
First Step
Create a Twilio Account & Get A Phone Number

1. Create a Twilio Account & Get a Phone Number
- Go to https://www.twilio.com and sign up for a free account or log in.
- In the dashboard, navigate to Phone Numbers > Buy a Number.
- Choose a phone number that supports SMS, then assign it to your project.
2. Replace the SMS Webhook in Twilio
- From the left-hand menu, go to Develop > Phone Numbers > Active Numbers.
- Select the number you just created.
- In the Messaging section, under “A message comes in”, select Webhook and change the method to HTTP POST.
- Do the same for “Primary handler fails”.
3. Copy and Paste the N8N Webhook URL
- Go to your N8N editor and open the Webhook node of your workflow.
- Copy the generated Webhook URL (for example:
https://n8n.yourinstance.app/webhook/yourworkflowid). - Paste that URL into both webhook fields in Twilio.
- Click Save Configuration to apply the changes.
This sets up Twilio to send incoming SMS messages directly into your N8N automation flow.
Second Step
Update Each Node Credentials and Add a Response Channel
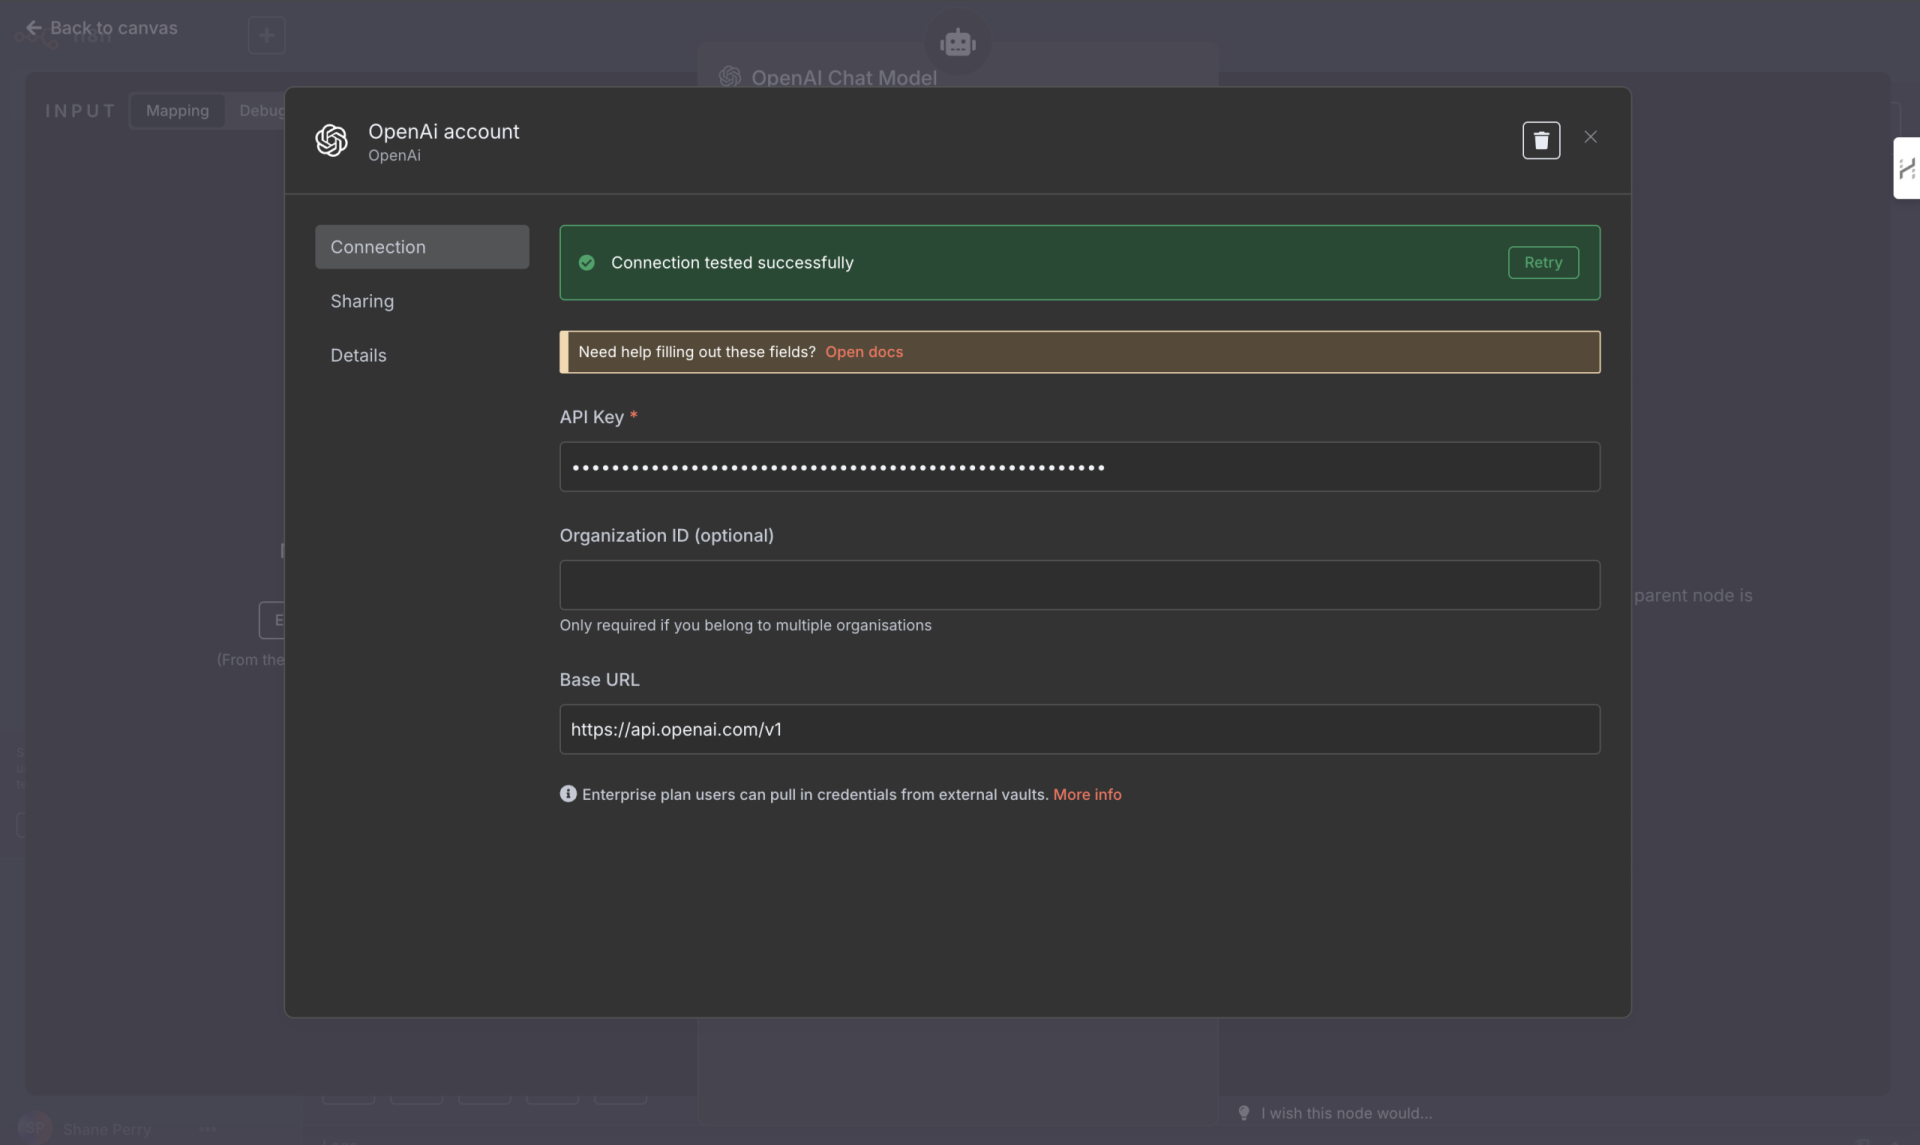
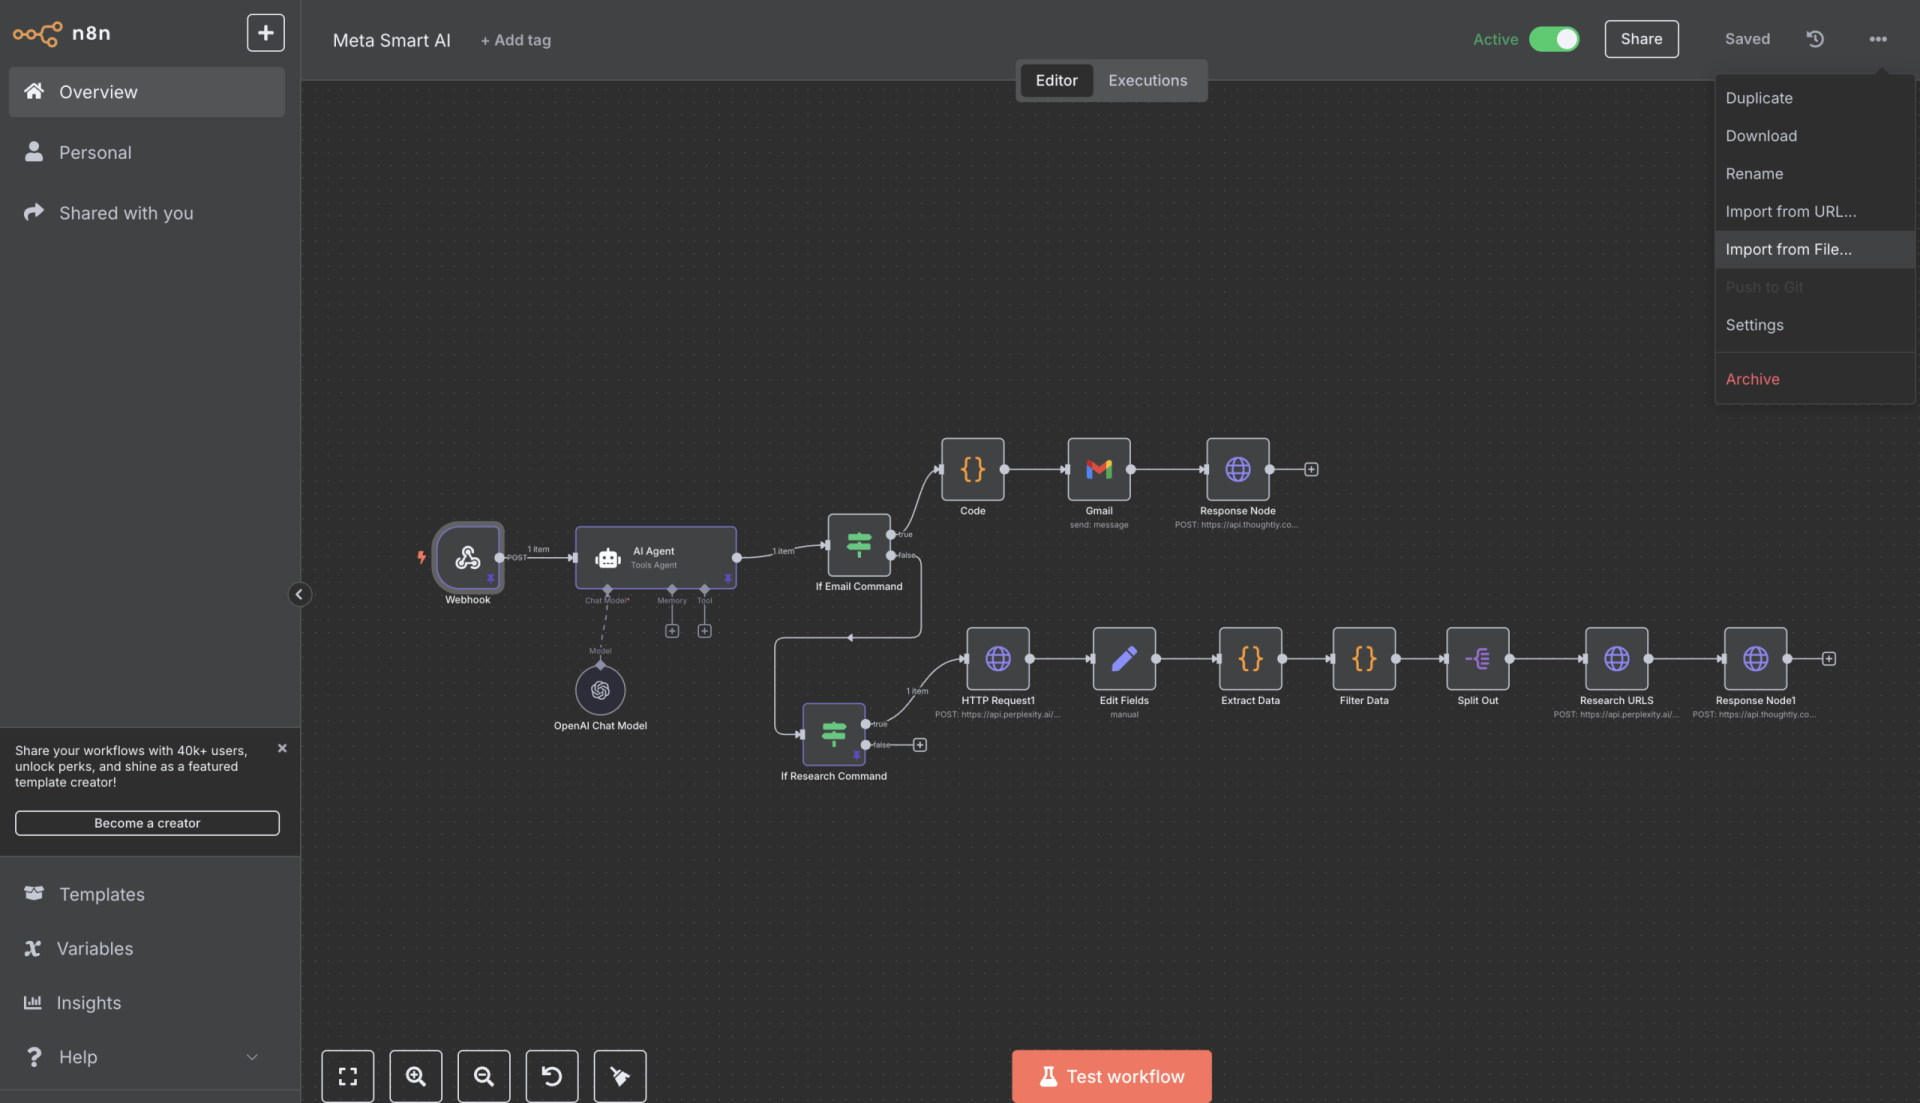
1. Replace Placeholder Credentials in Each Node
- Open each node in your N8N workflow (e.g., Gmail, HTTP Request, AI Agent, etc.).
- Update any authentication fields, API keys, or email addresses with your real credentials.
- For example:
- In Gmail: connect your Gmail account via OAuth.
- In OpenAI or external APIs: insert your valid API key.
- In any HTTP Request node: confirm the endpoint, headers, and payload are correct.
Tip: Hover over the node’s warning icon to identify missing or invalid credentials.
2. Test Each Node in the Flow
- Use the “Test workflow” button at the bottom of the editor.
- Trigger the workflow via your configured Twilio SMS webhook.
- As each node runs, check for green checkmarks (success) or red errors (failures).
- If any node fails:
- Reopen the node.
- Review the input/output data.
- Fix any credential, formatting, or logic errors, then retest.
3. Add a Response Node (WhatsApp or Facebook Messenger)
To complete the interaction loop—so Meta AI can respond back to users via smart glasses—you’ll need to push the final result to a messaging platform and make sure this is toggled on in your Meta AI App to receive messages. Once your final node is configured and tested, your workflow is complete.
You can now send messages via SMS, and receive dynamic Meta AI responses directly through smart glasses linked to WhatsApp or Messenger.